In Kubernetes, a pod is the basic unit of deployment. When you create a pod in kubernetes using yaml, It can contain one or more containers, with shared storage and network resources, and a specification for how to run the containers.
Pods are the smallest deployable units in Kubernetes, and they are designed to be used as building blocks for larger applications. A pod typically contains a single application container, but it can also contain multiple containers that work together as a single unit. The containers in a pod share the same network namespace, so they can all communicate with each other using localhost.
This allows the containers in a pod to easily coordinate and share data between themselves. Pods are ephemeral, which means they can be created and destroyed as needed, and they are typically managed by the Kubernetes control plane. This article will go though how to create a pod in kubernetes using yaml.
What is a yaml file
YAML (which stands for “YAML Ain’t Markup Language”) is a human-readable data serialization language. It is commonly used for configuration files, but it can also be used to represent any structured data in a concise and intuitive way. YAML files are often used in software development to define configuration settings, specify build instructions, and store metadata for programs and applications. YAML files use indentation to indicate hierarchy and structure, making them easy to read and write. They are designed to be portable and language-agnostic, so they can be used with a variety of programming languages and tools.
Creating a pod in kubernetes using yaml
Pods are the smallest deployable units of computing that you can create and manage in Kubernetes. Pods will will typically consist of one container which is the most common kubernetes use case. To create a pod using yaml, copy the following template into your code editor of choice:
apiVersion: apps/v1
kind: Deployment
metadata:
  name: nginx-deployment
  labels:
    app: nginx
spec:
  replicas: 3
  selector:
    matchLabels:
      app: nginx
  template:
    metadata:
      labels:
        app: nginx
    spec:
      containers:
      - name: nginx
        image: nginx:1.14.2
        ports:
        - containerPort: 80
Lets break down what each line in this yaml file is doing.
- apiVersion field specifies the version of the Kubernetes API that this object uses.
- The kind field specifies the type of object that is being defined, in this case a Deployment is being used. There are others such as job, daemonsets, service etc.
- The metadata section contains metadata about the Deployment, such as its name and labels. This will be the basis for the deployment and app name
- The spec section contains the specification for the Deployment, including the number of replicas to run, the labels to use for selecting pods, and the template for the pods.
- The replicas field specifies the number of replicas of the pod that should be run. So in our case 3 will be creates
- The selector field specifies the labels that should be used to select the pods that are part of this Deployment.
- The template field specifies the template for the pods, including the container image to use and the container port to expose.
- The containers field specifies the containers to run in the pods, including the name and image of the container and the container port to expose.
Deploy a kubernetes yaml file using kubectl
Now that you have a yaml file created. On the system this will be deployed we need to make sure we have access to the yaml file. If you havent already create a file on the server and paste the contents of the above yaml file into a .yaml file. Navigate to that directory and run the following command.
- kubectl apply -f test.yaml
my file is called test.yaml but yours may be a different name. you should get the following message “deployment.apps/nginx-deployment created”.
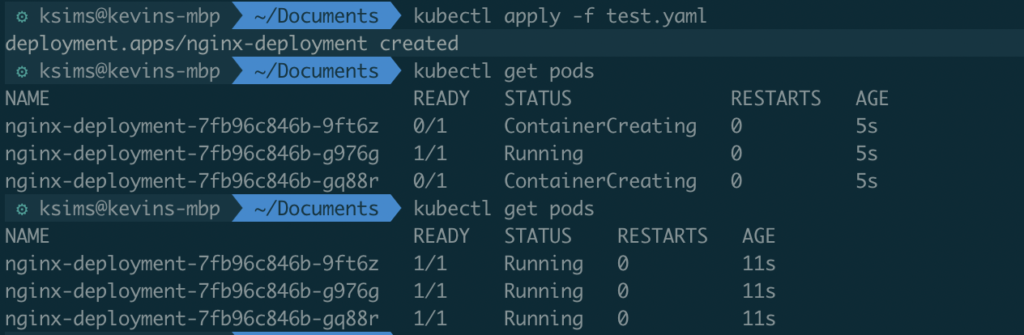
Now as you can see we have 3 pods and based off our deployment name they all start with nginx-deployment. To view more information about each pod we can also run the command “kubectl describe pod nginx-deployment-7fb96c846b-g976g”. This will output a lot of useful information for troubleshooting.
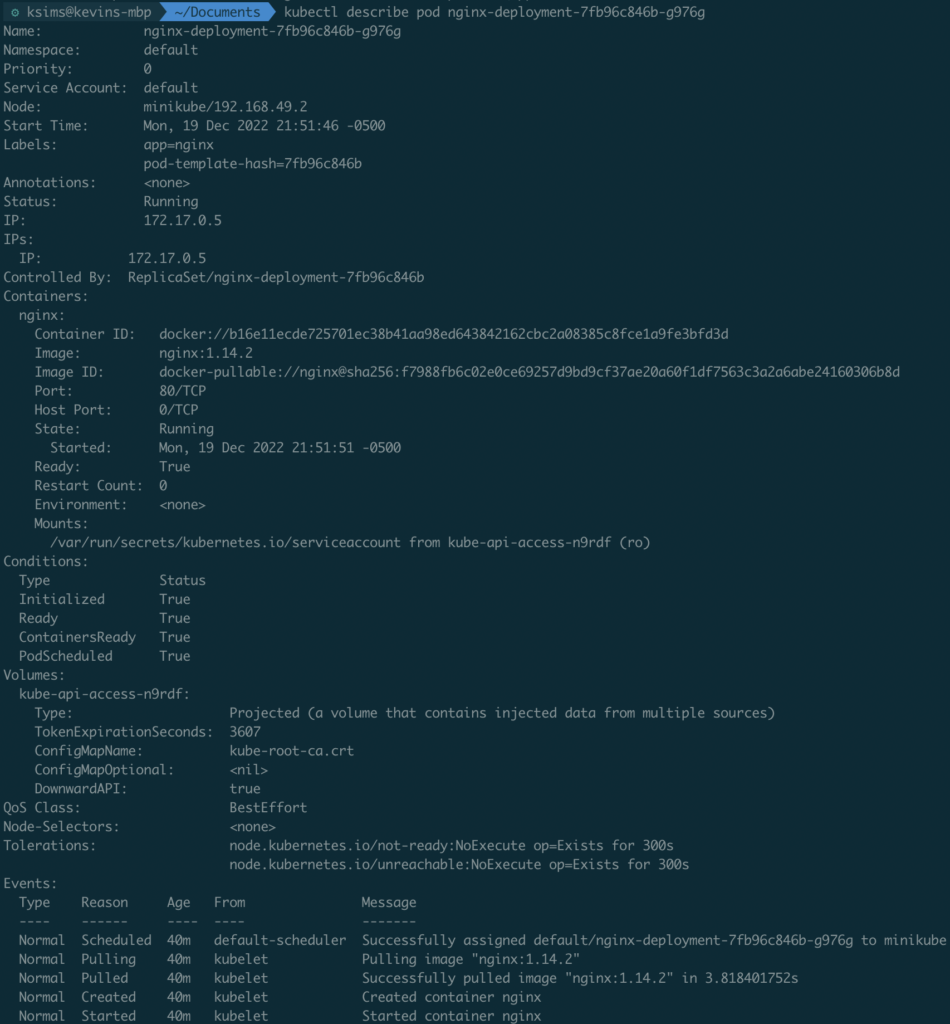
Based off our yaml file you can see from the output that our label is app=nginx and we are using version 1.14.2
Conclusion
This article described how to create a pod in kubernetes using yaml. This is only a glimpse of what you can deploy using a yaml file. Its best to keep your deployments deployed to repositories that way you can always revert back to needed changes.