Most administrators need to know how to configure SNMPv3 on vmware ESXI 7.0. The most secure way is to go with SNMPv3. SNMPv3 provides stronger security over SNMPv1 or SNMPv2c, including the ability to use key authentication and encryption. For more in depth knowledge of the different SNMP versions check out some more information here.
Here is a list of things that will be done in order to configure SNMPv3 on VMware ESXI 7.0:
- Configure an SNMP Engine which serves as the identifier for the agent
- Setup SNMP Authentication and Privacy Protocols
- SNMP User Setup for users who can access SNMP
- Configure SNMPv3 targets to allow the agent to send traps and informs
Configuring the SNMP Engine ID
Every SNMPv3 agent has an engine ID which is a unique identifier for the agent. The engine ID is used to with a hashing function to help generate keys for authentication and encryption of the SNMPv3 messages. The commands that follow will require access to the esxi host through either console or ssh access.
Using esxcli commands input the following command into your terminal:
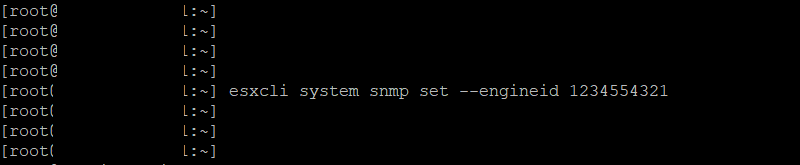
- esxcli system snmp set –engineid id
The id will be your 10 digit hexadecimal string like the picture below
Configuring SNMPv3 Authentication & Privacy
Authentication is used to identify users & Privacy allows for the encryption of the SNMPv3 messages. Although authentication and privacy are optional, you must enable authentication to enable privacy.
- First run esxcli system snmp set –authentication=protocol
(protocol can either be SHA1, or MD5)

- Then to setup privacy run esxcli system snmp set —privacy=protocol
(protocol can be either none or AES128

Configuring SNMPv3 Users
VMWare allows up to 5 users to be created to access SNMPv3. New users generate privacy and authentication hash values based on authentication and privacy passwords & SNMP agents engine ID. Changing the engine ID or authentication & privacy protocol after users are created makes the users invalid and they must be recreated.
Although you may enter the secret into the command line another secure way is to store these passwords in files on the host system.
First let’s get the privacy and authentication hash values for the user by running:
- esxcli system snmp hash —raw-secret —auth-hash secret1 —priv-hash secret2

If you are not using the –raw-secret parameter, then you fill put the path of the secrets file for the auth & privacy. Use a strong password using lower case and capital letters, numbers and special characters.
Now that we have the needed hash values, we can configure the users with the –user flag. Using my hash above the output would look like this all-in-one line:
- esxcli system snmp set —users admin/authhash/privhash/priv
the security at the end can be either auth (for authentication only), priv (for authentication and privacy), or none (for no authentication or privacy). If configuring a user with no hash your input would look like esxcli system snmp set –user user2/-/-/none.
Configure SNMPv3 Target Locations
You can configure up to three SNMPv3 targets. You must specify a hostname or IP address of the system receiving the traps or informs to configure a target.
Using esxicli the following command will set the trap receiver for the ESXI host alarms.
- esxcli system snmp set —v3targets <receiver ip>@162/userid/security-level/message-type
The commands are as follows. The receiver ip is the ip address of the host that will be receiving the informs or traps. 162 is the standard port for receiving traps but you can assign any port number as long as both sides match. The userid is the user that you created along with the security-level of priv, auth, none. The message-type can be either inform or trap.

Now that you have everything you need to configure SNMPv3 on VMWare ESXI 7.0, you can make sure the agent is running by running the command:
- esxcli system snmp set —enable true
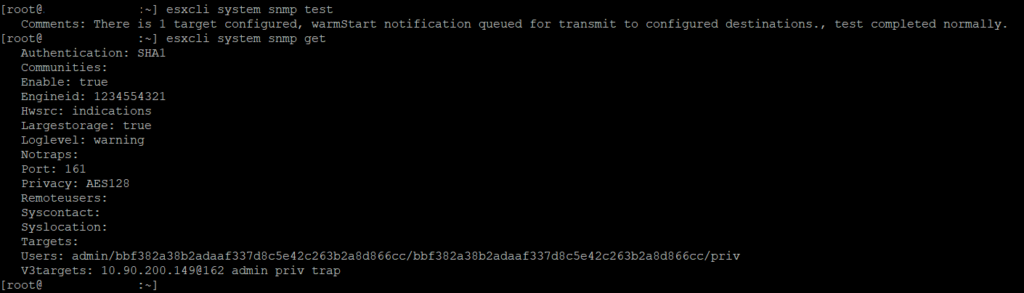
To test the snmp setup and review the configuration the following commands will display that output:
- esxcli system snmp test
- esxcli system snmp get